Here we go.
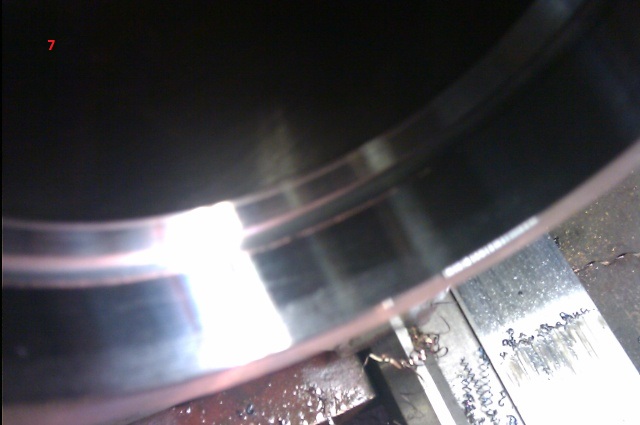
As you can see from my set-up the barrel is bigger than the bore of the lathe, so a steady rest is in order. To set-up the steady I dial the outside of the barrel to 0 then bring up the rollers of the steady as I roll the chuck in neutral, that way they come in contact with the barrel in motion which is how they will work when threading.
INSERT PIC1
The key to a good set-up is rigidity which means putting the support as close to the end to be machined as possible. In my set-up I placed the steady as close to the welded on port as I felt comfortable to keep deflection and vibration to the absolute minimum.
INSERT PIC2
Alright, now to start off you have to make the bore the right size to have proper depth to the root of your thread and also the proper height of the crest. This is along the same lines as drilling a hole to the right size in order to tap a certain size thread into it. The only difference is that the tap drill size when drilling is based around the factor of a 75% thread depth where single point threading is 100% thread depth right down to the .001” for different “fits” of the male and female pieces. To do this you use a formula which is
.6495 x 1/the pitch of the thread is you are going to cut. This formula is for a class 2 fit which is a standard General Purpose thread.
The pitch being how many full threads there is over the span of 1”. The answer will be the approximate SINGLE sided thread depth. To find what the overall depth will be just multiply what you get by 2. Now this is just an APPROXIMATE to put you in the general ballpark of the final depth. The end result on the piece may be over or below by tenths or even thousandths depending on how precise you bored your hole. I like to go .003-.005” bigger on my bore when making my hole so I don’t have to do any sanding on the threads in case the hole is too small. Just as when turning a piece to thread externally I go .003-.005” SMALLER that the nominal OD to achieve the same result which is no sanding.
K here’s what I was threading at work, it is a Buttress thread which is a self sealing/self holding thread with a completely different thread for than a standard V thread, but the same principles still apply. I had to make this gland with the mating outside thread
INSERT PIC3
Fit into the end of this barrel by making the proper mating inside threads.
INSERT PIC1 AGAIN
I had to make a 3 ¾”-12TPI thread inside the hydraulic cylinder barrels. So I punched .6495 x 1/12 (the TPI of the thread) into my calculator which gave me an answer of .054”. So that means that the SINGLE sided thread depth is .054”. Multiply that by 2 and I get .108” which means the overall thread depth I’m working with is the .108”. So now that I have that answer I can figure out what size I need to make the hole by subtracting the .108” from the 3 3/4” nominal diameter I need to hit. My answer is 3.642” (plus the extra .005” I like to go over to prevent having to sand, so it is actually 3.647”) so now I know what size to make my hole in order to achieve the proper thread depth.
Ok now that all the brain work is done it’s time to make the hands do what they need to do. First off we need to get our boring bar set-up to start making hole.
INSERT PIC4
Then I start boring to the proper depth and length of what we need for fitment.
INSERT PIC5
I tapered off the end of the thread so there won’t be a sharp edge that would rip seals on the piston when I assemble the cylinder.
Once i have my depth you will need to make an undercut for the thread to run out properly and not hit the shoulder ive made so I take a radius insert and make a groove at the end of the bore approx .010-.015” deeper than the depth of the thread so it will have a clean run out. I use a radius because it’s a stronger shape than a square which has sharp corners that could be a breaking point under stress.
INSERT PIC6
INSERT PIC7
Now comes the fun part, setting up and cutting the thread. Like I said the thread I was cutting is a Buttress thread which has a specific form with a 45 degree leading edge and a 7 degree backside edge. So the insert looks like this
INSERT PIC8
The mating threads have a cross section that looks like this
INSERT PIC9
Once I have my tool squared to the barrel I touch off the insert to the bore of the barrel and set my ZERO. I then set the gears on the lathe to cut the right TPI I need in this case it’s 12 using the chart on the lathe for the different levers. Once that is all set I fire up the lathe and start to focus on the thread chasing dial usually down and to the right of the carriage which will usually look like this
1
3 4
2
. With different pitches of thread, the lever should be engaged at certain numbers being the same number everytime you engage it to keep the pitch constant. If the TPI of the thread you’re cutting is a multiple of the TPI of the leadscrew on the lathe you’re using you can engage it anywhere on the dial over and over, a different spot everytime. My lathe’s leadscrew has TPI of 4 and the thread I’m cutting is 12 so I can engage it anywhere, anytime because 4 is a multiple of 12.
For my first pass I just want to scratch the surface so I can check that I have the right TPI set. I do this with a thread pitch guage, I set it to 12 TPI and compare it to my scratch.
INSERT PIC10
Once I check it and it’s good, I start taking my cuts. Once i get about .015” away from my .108” approx depth I start taking small cuts of .001” and check my mating guage in the case the threaded gland I’m using, to come to the proper depth slowly so I don’t go too deep and have a really loose thread.
INSERT PIC11
The thread is gonna look ragged during the threading process so don’t worry, you will have to condition it at the end to make everything smooth.
Getting closer. Now I have to start taking passes at my last depth to take the deflection out of the threading tool because it gets pushed out gradually as the insert moves through the piece. Doing the “spring” passes the tool pressure decreases which straightens out the thread making it even from front to back.
INSERT PIC12
To the final product which is the gland threading all the way to the shoulder of the barrel.
INSERT PIC13
So remember when I said that formula gives you an “approximate” depth and you’d have to tweek it to suit? Well I had to go .003” deeper then my formula told me to in order to make a proper fit to it’s mate.
INSERT PIC14
Some things I use to condition a thread at the end of the process’ are:
A pointed file run with the point in the root of the thread while the lathe is running because the thread will move the file along as it turns helping to clean out and burrs or sharp edges that would affect the pieces from mating together.
INSERT PIC15
A deburring blade to fix the lead of the thread from sharp edges or burrs.
INSERT PIC16
And lastly, a 120 grit emery cloth to clean or sand down the crest of the thread.
INSERT PIC 17
SO that’s how you set up and cut an internal thread. To cut an outside thread you use the same formula and principles mostly but different tooling.
Here's a quick rundown on some external threads. Like o said a lot of the principles apply from internal threading. The .6495 formula is still used to determine depth, but you don't need it to find the diameter to machine to because this time you turn the od to aboot .005" under the nominal diameter shown in the thread designation.
Ex. I needed to put an 1 7/8" - 12 you thread on this smaller hyd cylinder barrel.
INSERT PIC18
So I turn it to 1.870" with the same type of radius undercut relief as the internal.
INSERT PIC19
Touch off with the threading tool to find 0 and take a scratch pass to check your tpi settings with a thread pitch gauge.
INSERT PIC20
Once your sure you can start threading. Once you get close to your calculated depth you can start conditioning the thread and checking with a calibrated gauge.
That's all for now folks.